Plastic Bagsket
The Motivation:
Both recycle a lot of plastic shopping bags and simultaneously remove the need to get any more of them.
The Solution:
Create a large plastic bagsket with a woven base and braided handles using a pair of scissors and completed in 6-8 hours.
Results:
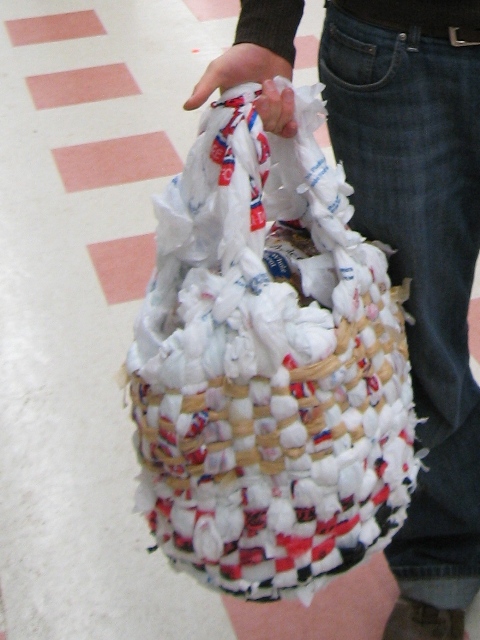
The bag did its job, holding a basketful of heavy vegetables with minimal stretching, despite rough handling.
Thanks:
Thanks to Hannah for helping me make this, it might still be a tangled mess of plastic if not for her.
Previous Work:
Many people have tried to find alternatives to plastic shopping bags, as well as artistic ways to recycle them.
- Crotchet a bag out of plastic yarn. This method takes a very long amount of time, you need both to make then yarn and then crotchet.
- Iron a lot of bags together to make a durable fabric. The fabric slices made are so small that you need to sew them together to make a reasonably sized bag. The intensive work involved means people usually use this for a pretty cover for a pre-existing bag.
- Purchasing a re-usable shopping bag. Stores sell these recycled fabricy and green reusable bags. To get these you need to spend some money - and there will be no recycling of the plastic bags you already own. Also, these bags are usually not much bigger than the small plastic bags they replace.
Instructions: for printable instructions click here:
Note: One of my friends wants me to hold a bagsket making workshop, if you have any interest is participating submit your info here.
Disclaimer: I am not a graphic artist so these
instructions don't really look so good. If anyone would like to redraw these
and allow me to put them up here (with credit) it would be much appreciated
 .
.
The first step to weaving a bagsket is creating a long thread. You will increase the length of this thread one bag-length at a time and you can get two thread-segments with each bag as shown below. Cut along the dashed lines.
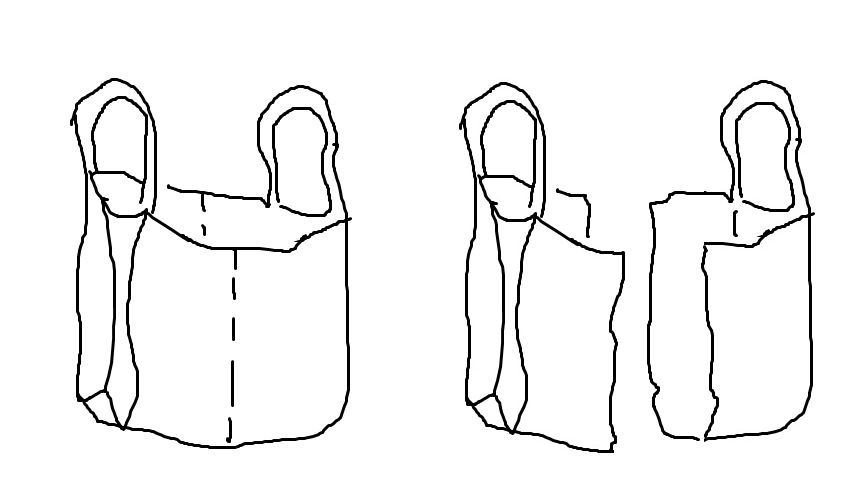
These is the only steps are the only ones for which a
pair of scissors will be helpful. Cut again along the dashed lines again
making a strong loop of plastic out of each half bag.
Below is a schematic, and a sort of sketch of how to tie these long
plastic rings together to make the thread. This sort of "knot" is great
because it takes up very little volume, does not waste any plastic and takes
only about 2 seconds to make.
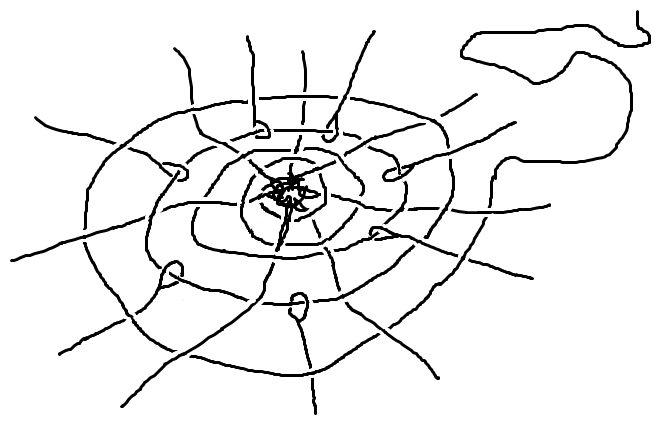
Once you have a thread a few bag-lengths long, it is time to start. You
string the handles of an odd number of bags together on the thread and then
tighten the thread. I used 11 bags for the first row, any reasonable number
is fine but it cannot be an even number or the weave won't work out
correctly. The diagram, and diagrams that follow show fewer bags to make the
images clear. The dashed line shows how to start weaving the thread around
the center of the bags.
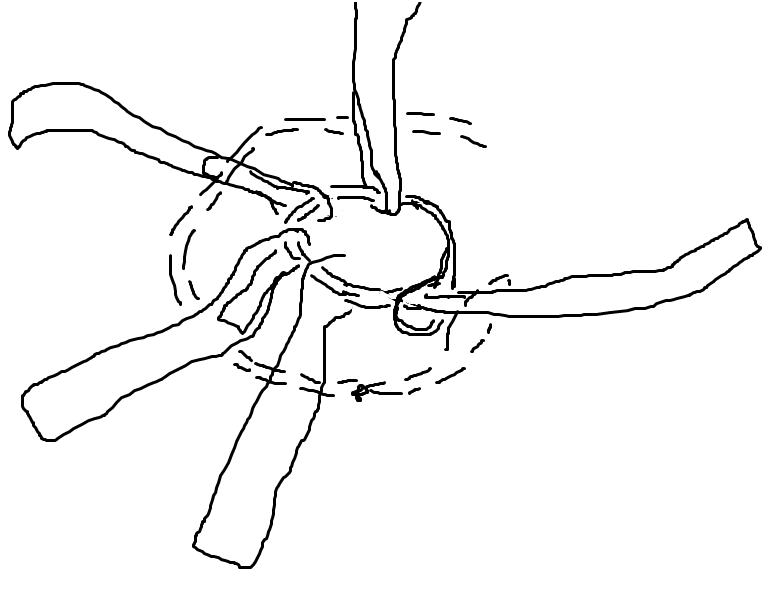
As the bagsket grows outwards you need to quickly add more bags or they
will be too spread out to get a nice weave. See the schematic below to see
how to add more bags to the weave, the needle looking holes represent the
holes in the bag handles. It is important to add bags at evenly spaced
intervals around the center. As you can see below, I approximately doubled
the number of bags each time by adding an extra bag in between every other.
(You actually get N-1 extra bags). Note that fewer bags are shown here than
the number of bags that were actually used.
When do I add bags?
Take all the numbers below with a grain of salt, this doesn't need to be perfect, in fact I'm pretty sure that I didn't do this perfectly
- Start out with 11 bags hanging off the central ring.
- Add 10 more bags to get 21 all around when you are about 7 rows out from the center.
- Add another ring of bags when you are about 15 rows out. The total bags all around should be near 41. For some reason my bagsket counts 39 bags going around - that means I didn't do it perfectly. Don't worry too much about being perfect, it can get very confusing. Just make sure you focus on anything I say that is actually important.
This is the first plastic bagsket of its kind, its a work in progress so feel free to improve on the design.
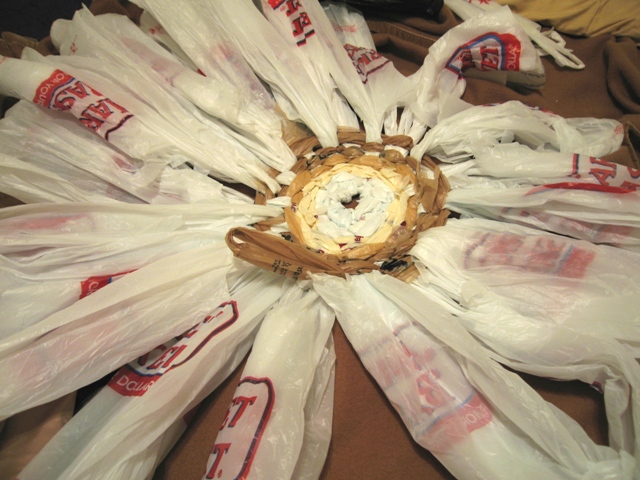
Below you see the "sunflower" look when it is just
starting after I've added the first extra ring of bags.
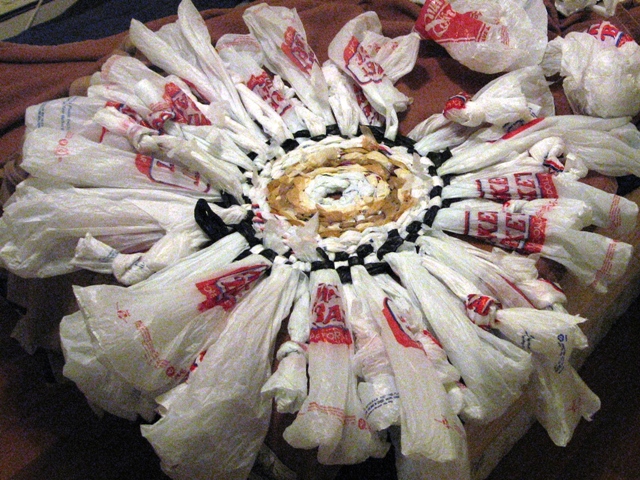
Here is what it looks like when the next set of bags are added. Notice
that the end of every other bag has a loose knot tied. That is to help
keep track of all the bags when weaving (good idea Hannah!).
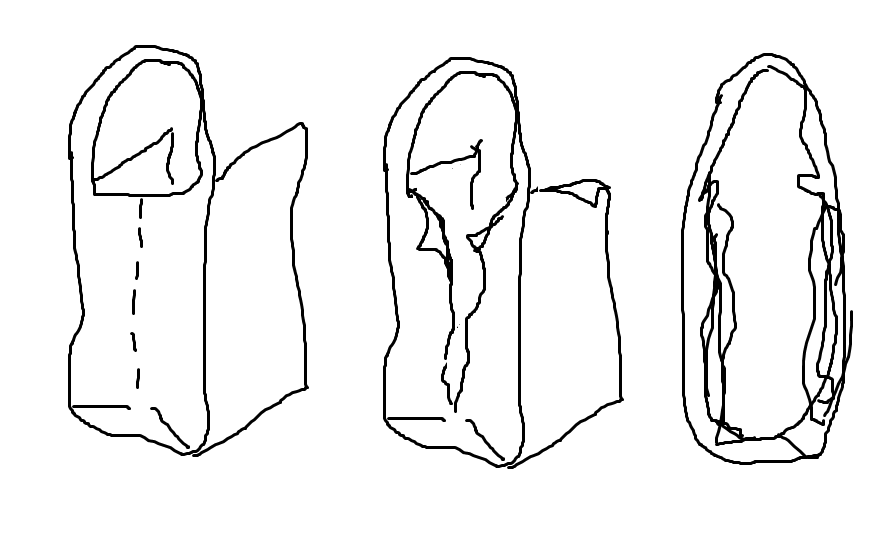
How do you make the bagsket turn up and take shape?
Creating the shape of the bag is all about keeping the right amount of length in the thread as you weave it around. If you weave the thread too tight then the bagsket will be constricted, too loose and it will billow out. When it is time to turn the bag vertical, make sure that each new row of the plastic thread has the same length around as the row one below it.
A good location to start turning the bag up is a rows after you added the last ring of bags, about 18 from the center ring.
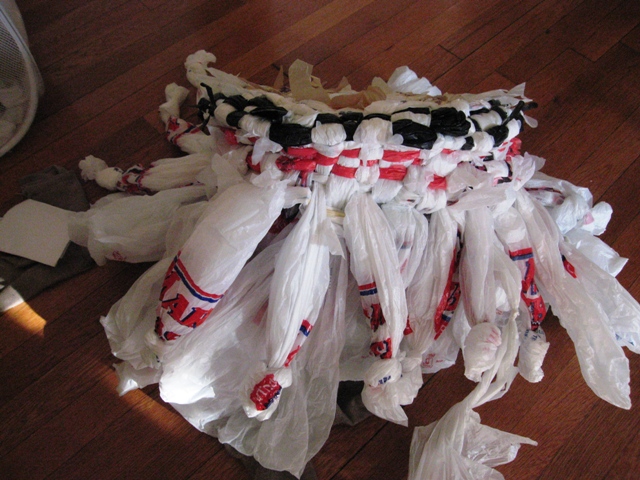
Below is a picture of the state shortly after turning the bagsket up.
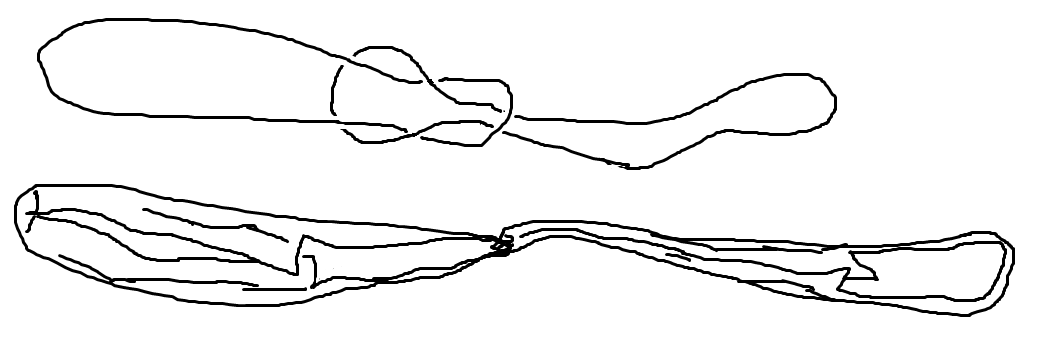
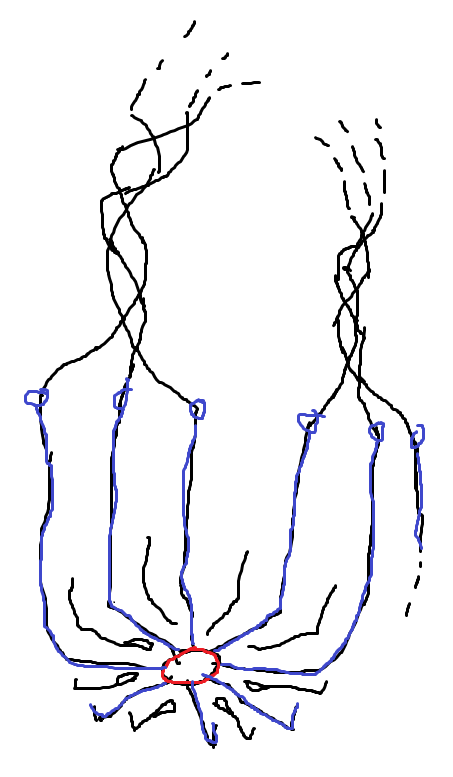
What about the handles?
The handles are a very important part of the bagsket, if they are not done right then your bagsket could stretch and perhaps break under a heavy load. As you can see in the diagram below, the blue bags that loop around the central ring are the bags that the handles must be attached to. In this way you get a structurally solid bagsket. The extra bags that were added after the central ring are not really meant to be weight bearing.
The handles themselves are braided, a simple three braid for each half of the handle. The two sides of each handle should be braided into each other, I found this step too difficult to draw so please try to use your imagination. The extra bag ends that are not weight bearing can be woven into base of the handles for added strength. Don't stress about this step, just weave it in a way that feels right without any regular pattern.
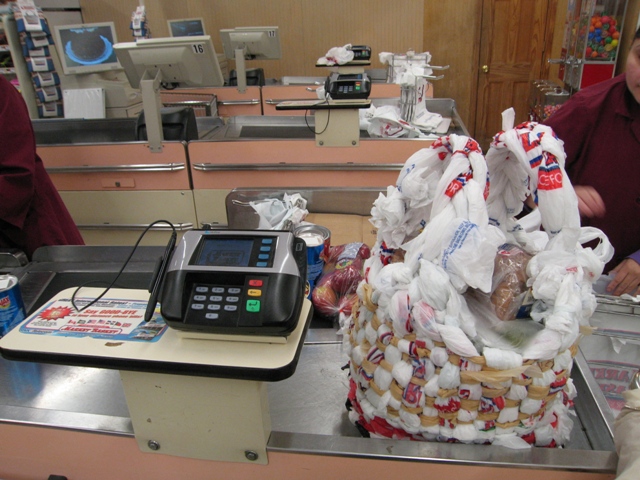
Your done - time to go shopping!
Once you get the handles finished its go to your local grocery and test out your new plastic bagsket.
More Details:
If you have made it this far down, then you are probably interested enough to know some more details.
This sort of bag has a few unique advantages, such as the following:
- The thickness of the bagsket act as as significant padding so it could be used to carry delicate objects
- the durable weave deals very well with sharp objects that sometimes rip single gags (like pasta boxes).
- The double braided handles are very soft, this allows you to hold a lot of weight very comfortably.
- This sort of bagsket can be folded up to save space.
The supermarket in the photo is Market Basket. They are very liberal with the number of bags they use and so the majority of the bags in the bagsket came from Market Basket.